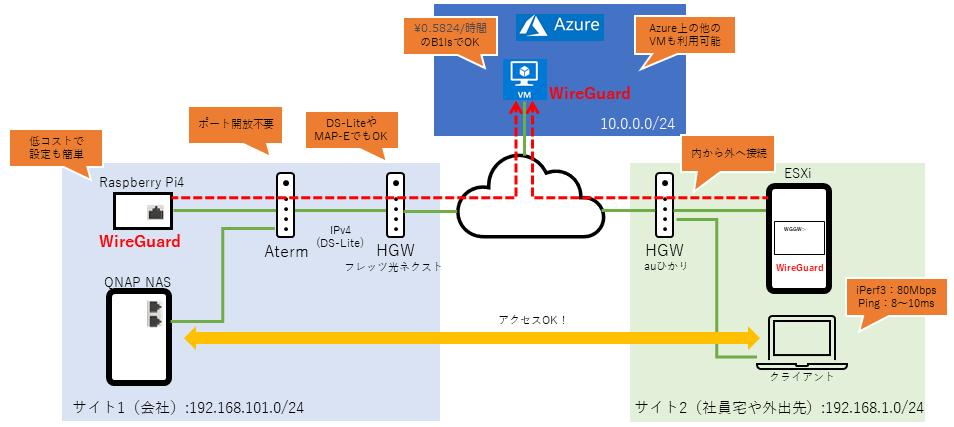
VPN connection to the company via Azure! Try creating a VPN that connects the company and employees' homes with WireGuard VM on the cloud
Now let's see how it actually works. First, prepare the cloud environment.
I used Azure this time, but other services such as Amazon EC2 (t2.micro, which is eligible for free benefits, and low-priced t2.nano are also OK).
I used Ubuntu 20.04 for the OS. After doing the minimum update, "sudo apt install wireguard", it is easy to install WireGuard in one shot.
In addition, the VM should be configured to allow WireGuard's port (standard 51820, but optional) in the security group.
Set up a DNS name that can be accessed externally Pass through WireGuard's portWhen you're ready, set up your server. First, edit "/etc/sysctl.conf" so that IPv4 can be forwarded.
net.ipv4.ip_forward=1Next, create a pair of public and private keys to be used for connection as follows. Required for the server and all connecting clients (peers). Here, only "client1" is created, but create client2, client3, etc. repeatedly.

mkdir wgkeyscd wgkeyswg genkey > server_private.keywg pubkey > server_public.key wg genkey > client1_private.keywg pubkey > >Since these keys need to be registered in the WireGuard configuration file, use the "cat" command to display the contents and make a note of the keys (secret keys must be strictly managed).When you are ready, create a new WireGuard configuration file (/etc/wireguard/wg0.conf). The configuration information is as follows.
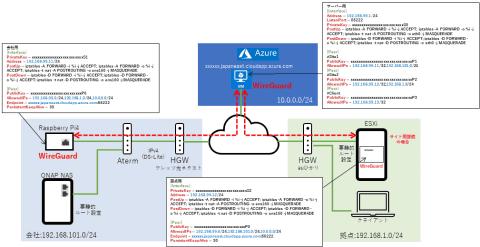
Server setting WireGuard setting information for the VM on the cloud that operates as a server Register the private key of the server and the public key of the client created earlier to the WireGuard of the VM on the cloud. The internal address of the VPN used "192.168.99.0/24" this time, and the server was assigned "192.168.99.1/24".
The point is the "Peer" section. This time, since WireGuard on Azure VM will aggregate the connections of other sites, we will describe the information of the WireGuard client installed on the site side.
The most important item is "AllowedIPs". If this description is incorrect, an inaccessible destination will occur.
WireGuard automatically configures routing between networks internally, and the base information is this "AllowedIPs".
Basically, you just specify the internal address that you want to assign to the WireGuard you want to connect to. As with "#Client" in the above figure, when a PC or mobile terminal is connected alone, it is sufficient to access only that terminal, so only the internal address of the terminal is sufficient.
On the other hand, Site1 and Site2 in the "Peer" section of the server settings are examples of settings for inter-base connections. When connecting networks such as the head office and branch offices, it is necessary to be able to access the local network behind, so add the internal network of the connection destination by separating with ", (comma)".
For this reason, you can basically think that WireGuard will automatically determine the route by describing the "network you want to connect" here.
Once you have configured the above, check the operation with the following command.
sudo wg-quick up wg0sudo wg
If there are no errors, set the server to start automatically with the following command, and the server-side settings are complete.
sudo systemctl enable wg-quick@wg0
